AI CLIENT GUIDES
Use the Nexbion API with OpenCode
Add the Nexbion provider once, then select a Nexbion model from the OpenCode model picker.
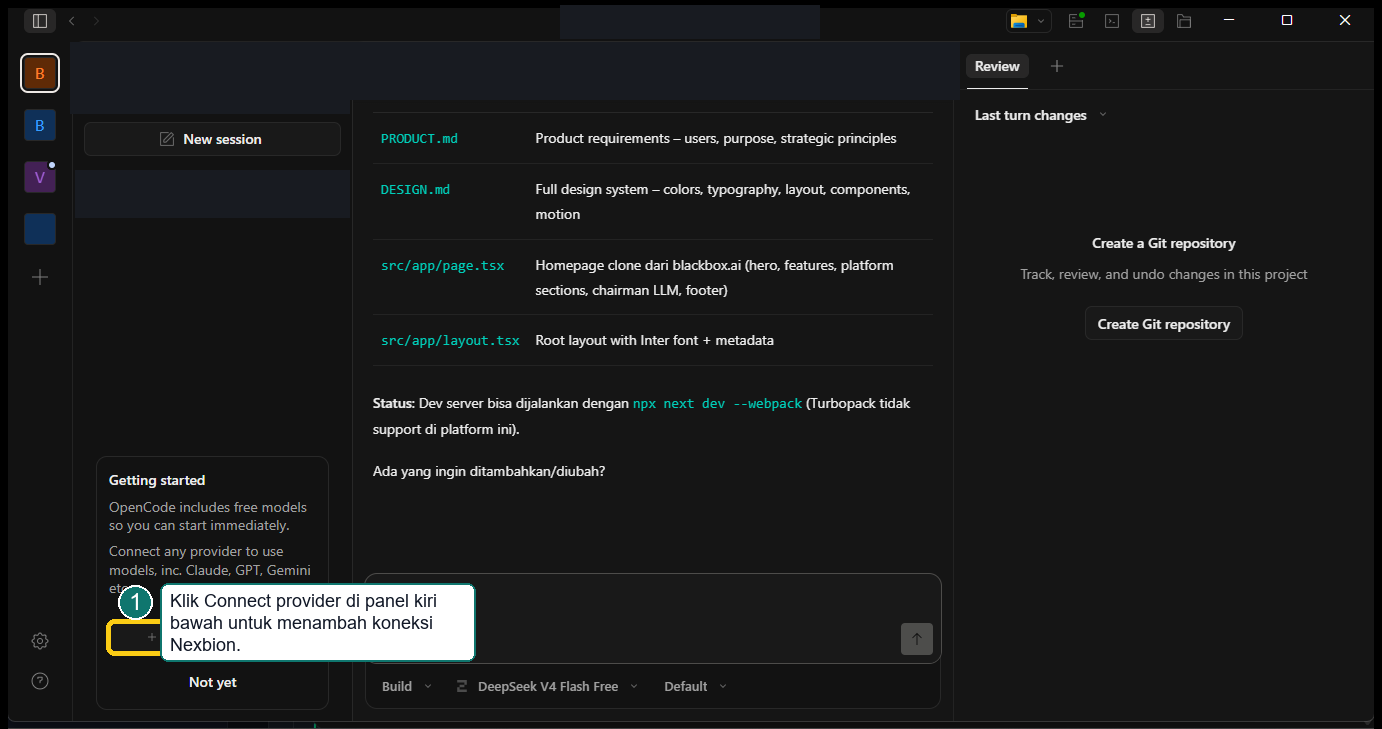
Prerequisites
- OpenCode Desktop is installed
- An active Nexbion API key
- HTTPS access to api.nexbion.com
Configuration steps
- 1
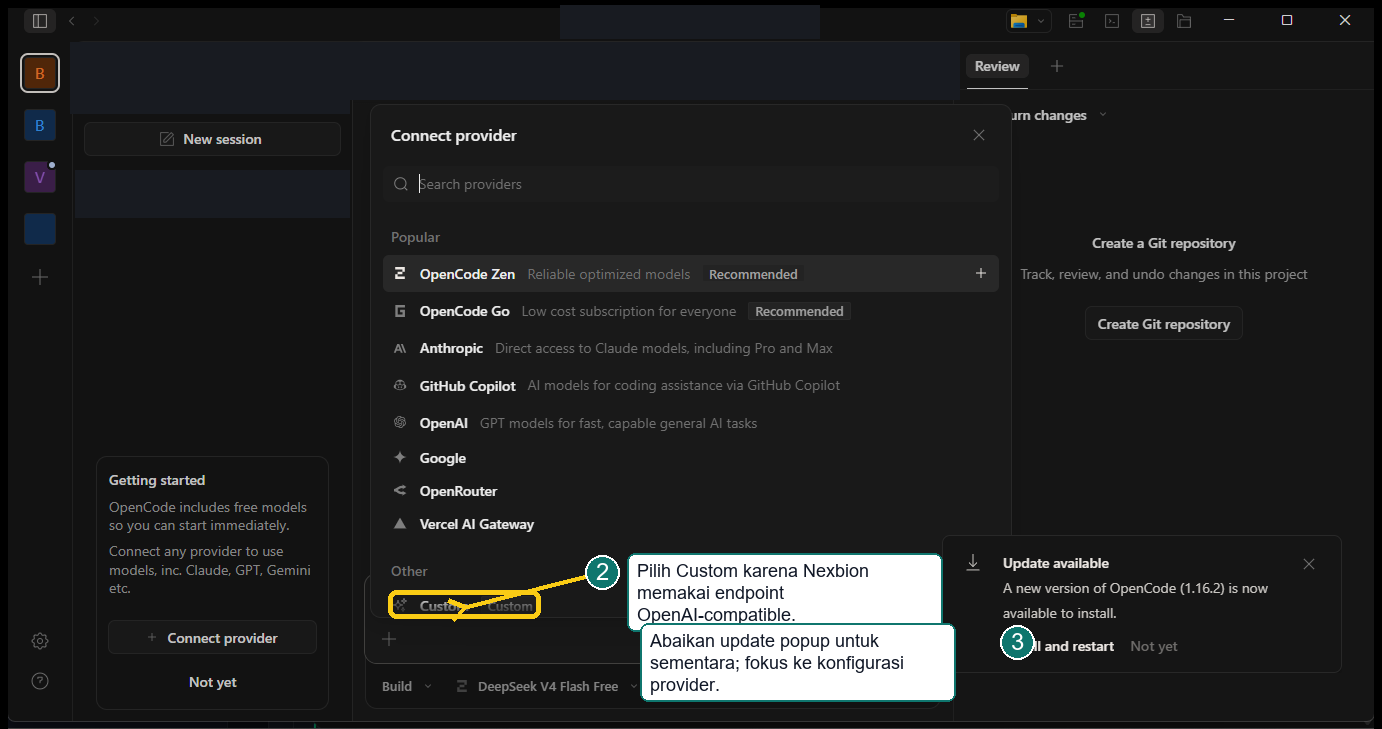
Open Connect provider, then choose Custom provider.
- 2
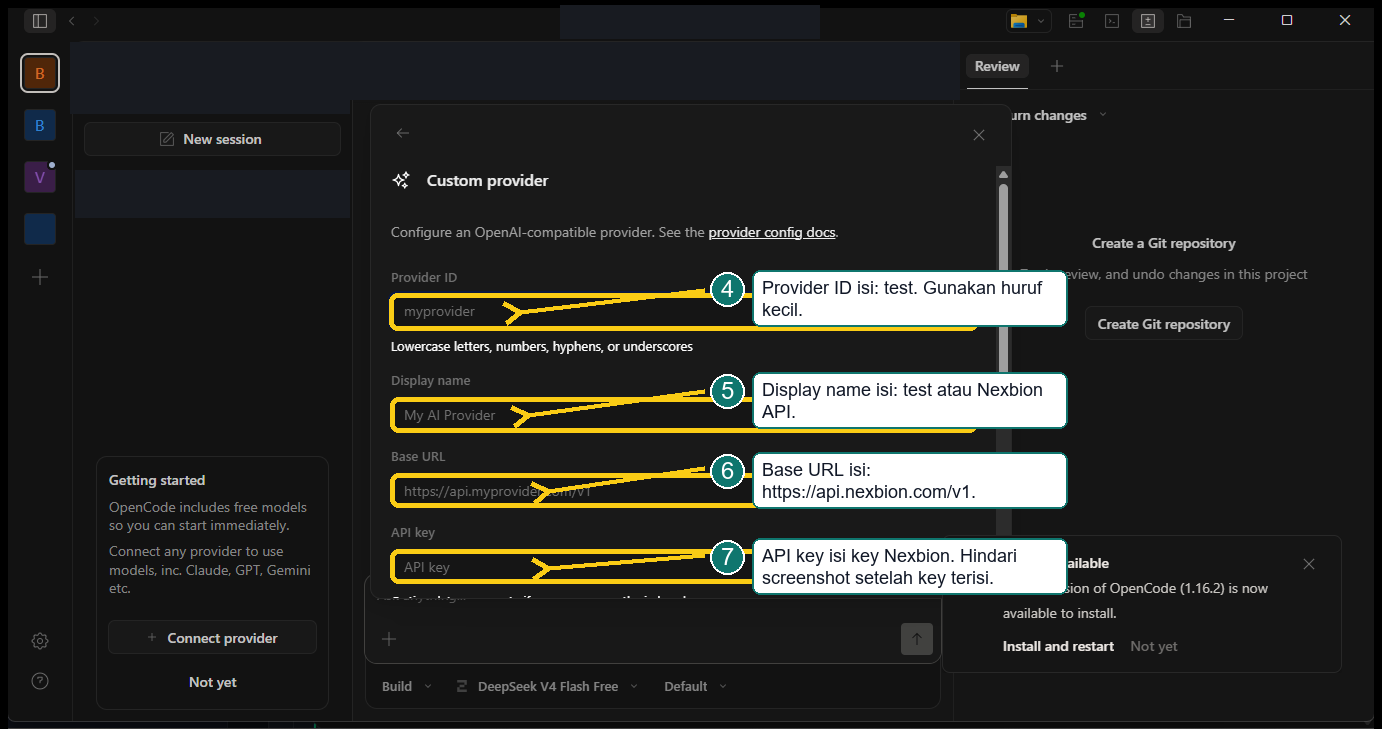
Set the Provider ID to test and use Nexbion API as the display name.
- 3
Enter the public Nexbion Base URL and your API key.
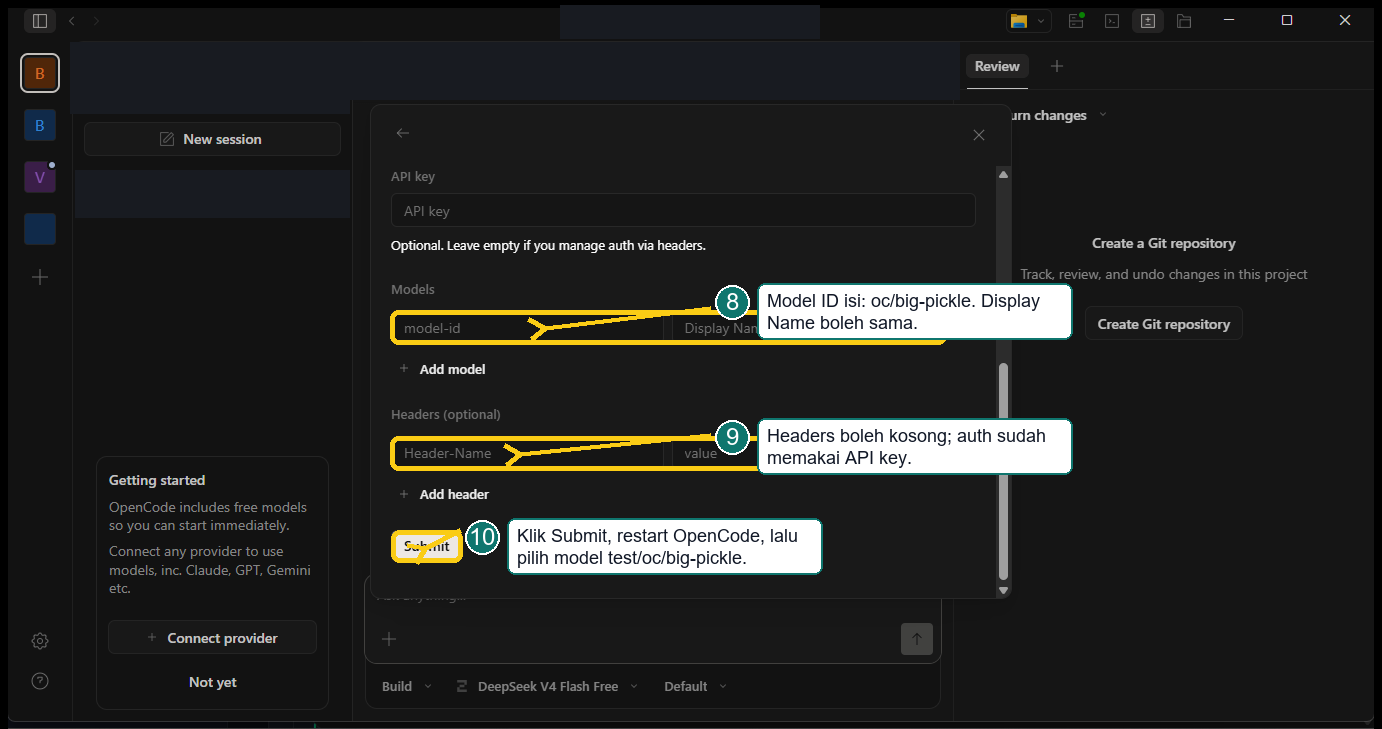
- 4
Add oc/big-pickle, save the provider, then select that model.
OpenCode
1Connect provider
2Custom provider
3Enter endpoint and key
4Add the model
{
  "model": "test/oc/big-pickle",
  "provider": {
    "test": {
      "name": "test",
      "npm": "@ai-sdk/openai-compatible",
      "options": {
        "baseURL": "https://api.nexbion.com/v1",
        "apiKey": "<NEXBION_API_KEY>"
      },
      "models": { "oc/big-pickle": { "name": "oc/big-pickle" } }
    }
  }
}
Visual walkthrough
Validate the connection
$headers = @{ Authorization = "Bearer $env:NEXBION_API_KEY" }
Invoke-RestMethod -Uri "https://api.nexbion.com/v1/models" -Headers $headerscurl https://api.nexbion.com/v1/responses \
-H "Authorization: Bearer YOUR_API_KEY_HERE" \
-H "Content-Type: application/json" \
-d '{
"model": "gpt-5.5",
"input": [
{
"role": "user",
"content": "Reply with exactly pong"
}
],
"max_output_tokens": 20
}'$body = @'
{
"model": "gpt-5.5",
"input": [
{
"role": "user",
"content": "Reply with exactly pong"
}
],
"max_output_tokens": 20
}
'@
curl.exe "https://api.nexbion.com/v1/responses" `
-H "Authorization: Bearer YOUR_API_KEY_HERE" `
-H "Content-Type: application/json" `
-d $bodyKeep your API key in a local secret or environment variable. Never place it in a repository, screenshot, workspace setting, or application code.